Exporting for Inochi2D (VTuber Model)
Inochi2D is a free and open source 2D animation framework similar to Live2D, currently in beta phase. You can learn more about the project here, follow their Twitter account here, or join their Discord community here.
Please note that Mannequin Character Generator is not part of Inochi2D. If you want to support Inochi2D for the betterment of both the game development and VTuber industry as a whole, we strongly recommend donating via their Patreon, GitHub Sponsors, or contributing codes and translations to the GitHub repository.
Both Inochi2D and the Inochi2D export feature in Mannequin Character Generator is still in beta. Backup your character often (especially your exported .inx file) and expect a lot of changes happening quickly as both Inochi2D and Mannequin Character Generator develops further!
Video Tutorials
We have made some video tutorials explaining this export feature: Free 2D VTuber Livestreaming with Mannequin and Puppetstring!
Pose, Physics and Movement
At the top of this section, you can configure the desired pose of your exported character. This defaults to Current Pose, which is what you see in the preview section. You can also choose to have multiple poses exported at the same time into a single file, which will allow you to switch poses later in Puppetstring (for example, having default arms down pose, holding gamepad pose for gaming and holding mic pose for karaoke streams).
To choose multiple poses, first click the Choose... button. The library window will be shown, listing all of the available poses. From this window, you can select the templates that you want to use by clicking on the thumbnail, deselect them by clicking again and then clicking the Continue button once you're done.
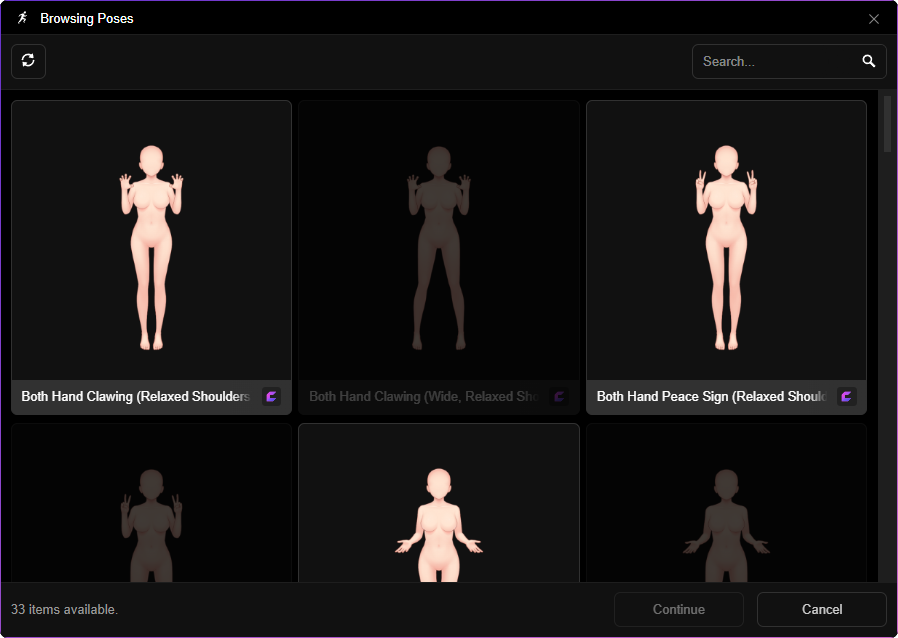
Below the pose section, you can adjust how much physics movement by choosing between Less, Default or More for each of the available physics area listed.
Finally, you can adjust Dampening/Smoothing, which will affect how much smoothing will be applied to tracking data while you stream. More Dampening/Smoothing will result in smoother movement notably when camera/face tracking FPS is low. This however, comes at the cost of less responsiveness.
Choosing Templates for Inochi2D Export
To export fully rigged characters with head turn, eye gaze, blink and lip sync already set up, you must always choose pose, clothing or body parts templates which are pre-rigged. Templates which are pre-rigged for Inochi2D are marked with icon.
There's a checklist that will help you validate your template selection in the Rigged Output panel. At the bottom of this panel, you can see if your output file will be fully rigged or partially rigged. For VTubing purposes, always aim for a fully rigged status. However, partially rigged output can still be useful for making animations or static images (i.e. for making YouTube thumbnails).
After making sure you have used the proper templates, simply choose the Inochi Creator (.inx) format option when exporting your character. Now your exported character will have parameters already generated when opened with Puppetstring or Inochi Creator.
Using VTuber Model Output for Livestreaming
To livestream with your exported model file, you'll need:
- Puppetstring, which can be obtained through itch.io or Steam.
- Open Broadcaster Software (OBS), which can be obtained here.
- On Windows, it's highly recommended to instal OBS Spout2 plugin, which can be obtained here.
- On Linux, it's highly recommended to install
obs-vkcapture/obs-gamecapturepackage, which can be obtained through different means depending on your distro. Learn more about this here.
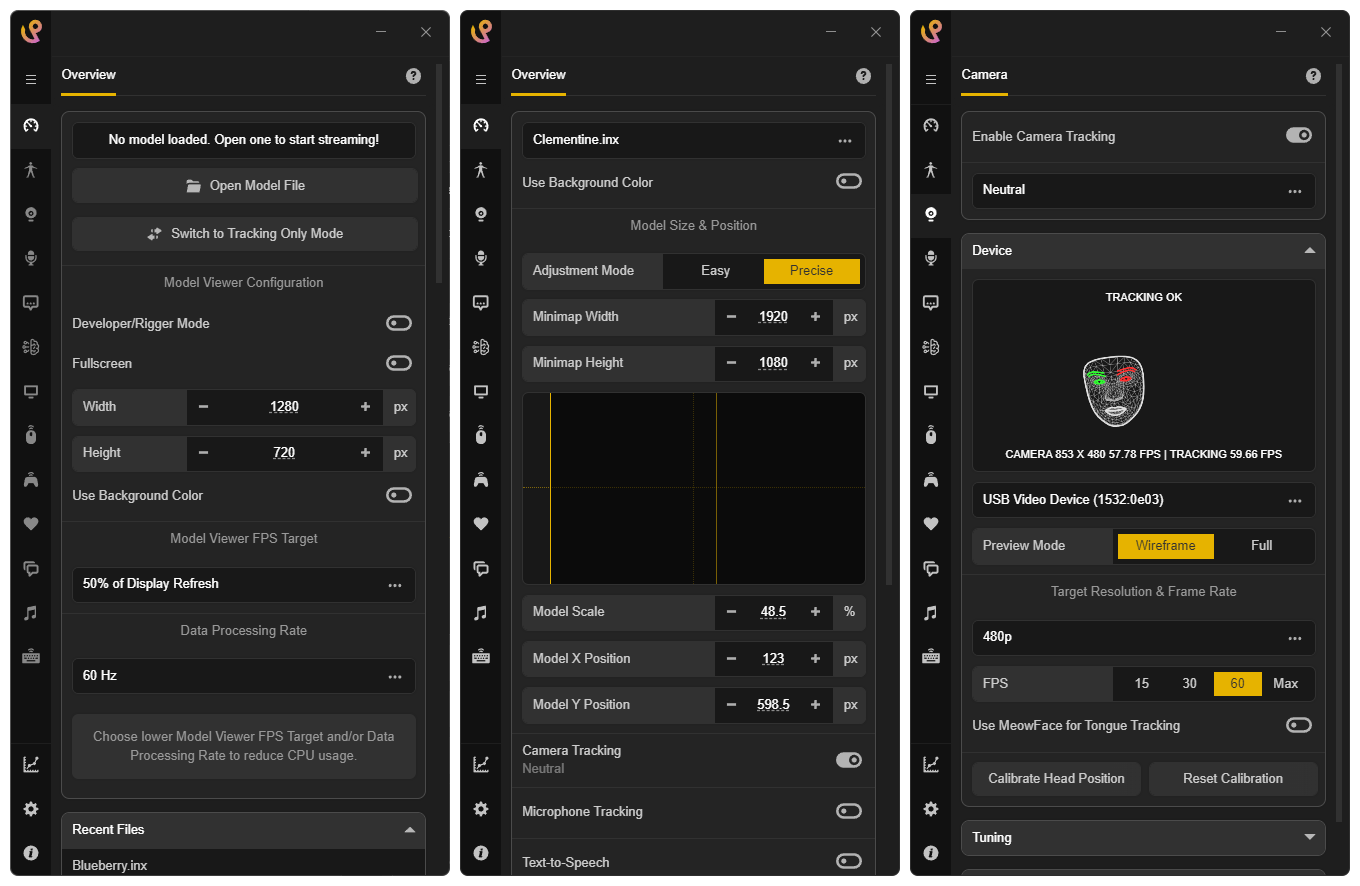
To open your model file in Puppetstring, just click Open Model File and browse for your previously exported file. Afterwards, you can choose between two ways of moving your character around the screen: In Easy mode, click and drag your character to move or click + hold + scroll wheel to make your character bigger/smaller. In Precise mode, clicking your character does nothingl; you have to use the minimap (click and drag there to move your character) or input the exact value in the provided input fields.
To make your character move, you can enable one of the available trackers provided by Puppetstring. For example, you can click the webcam icon in the sidebar and turn the tracker on via the toggle at the top right. Afterwards, you can choose what webcam to use and your character will move by following your facial expression.
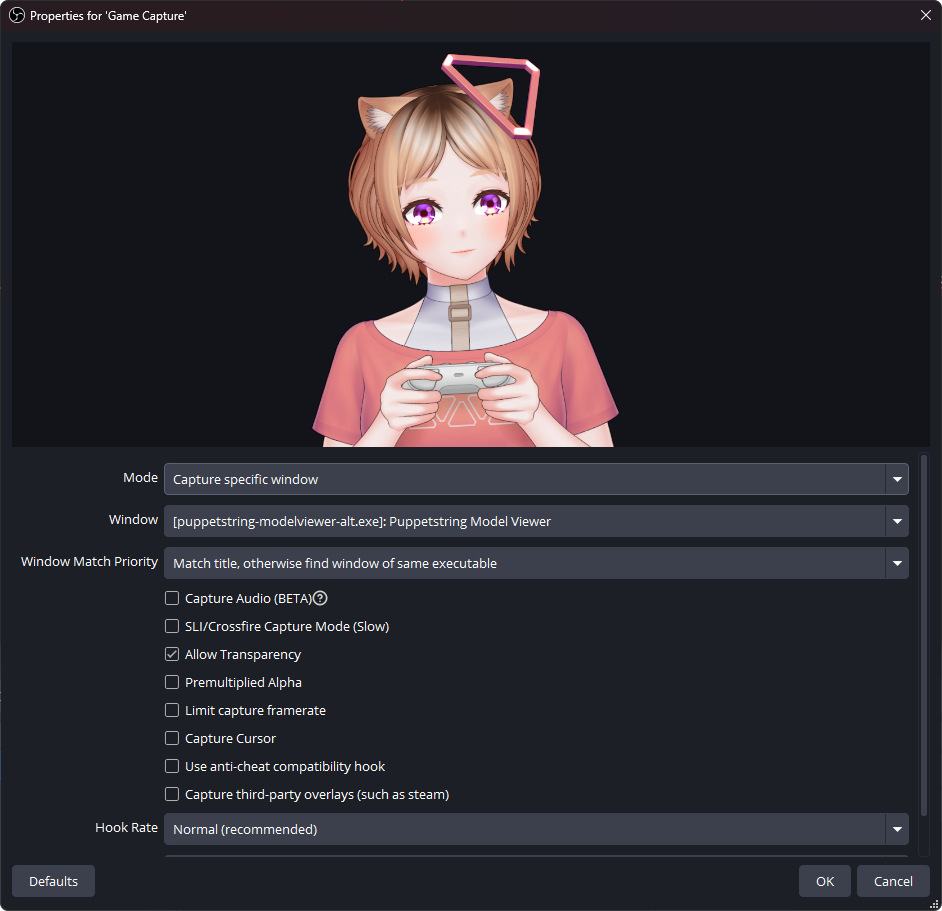
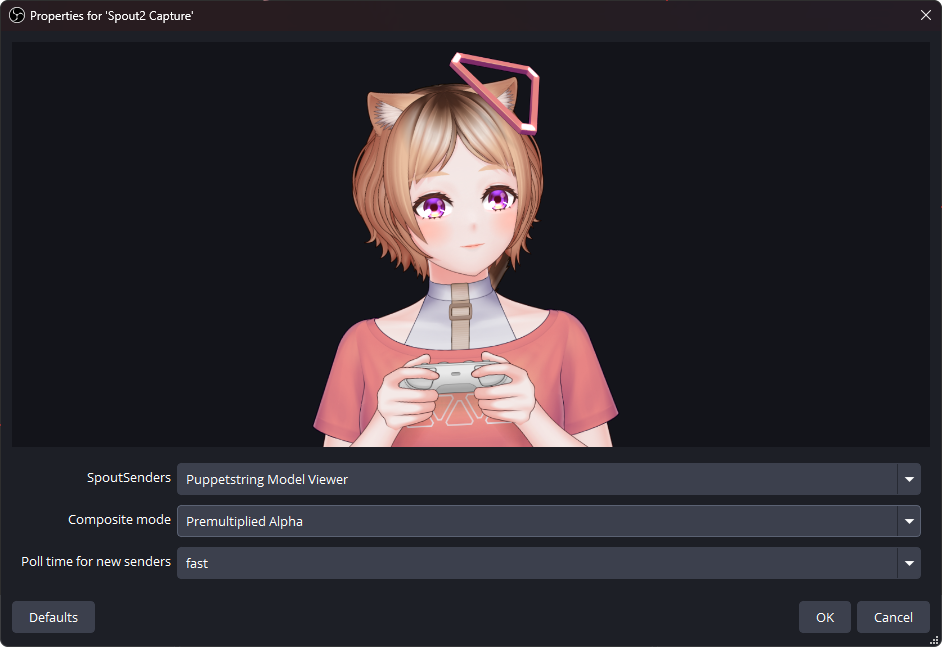
On Windows, you can use either Game Capture (no need to install plugin) or Spout2 Capture (need to install OBS Spout2 plugin mentioned above, but less strain on CPU/GPU, capture still running even when Puppetstring Model Viewer window is minimized) as a source to display your character.
When using Game Capture, use Capture specific window mode, then choose Puppetstring Model Viewer window and make sure to enable Allow Transparency.
When using Spout2 Capture, choose Puppetstring Model Viewer as SpoutSender and make sure to choose Premultiplied alpha as the composite mode.
You can learn more about Puppetstring via its own documentation here.
Using VTuber Model Output for Graphic Design/Animation
To pose or manually animate your model file, you'll need Inochi Creator, Inochi2D's official editor which can be obtained for free through GitHub or paid through Steam.
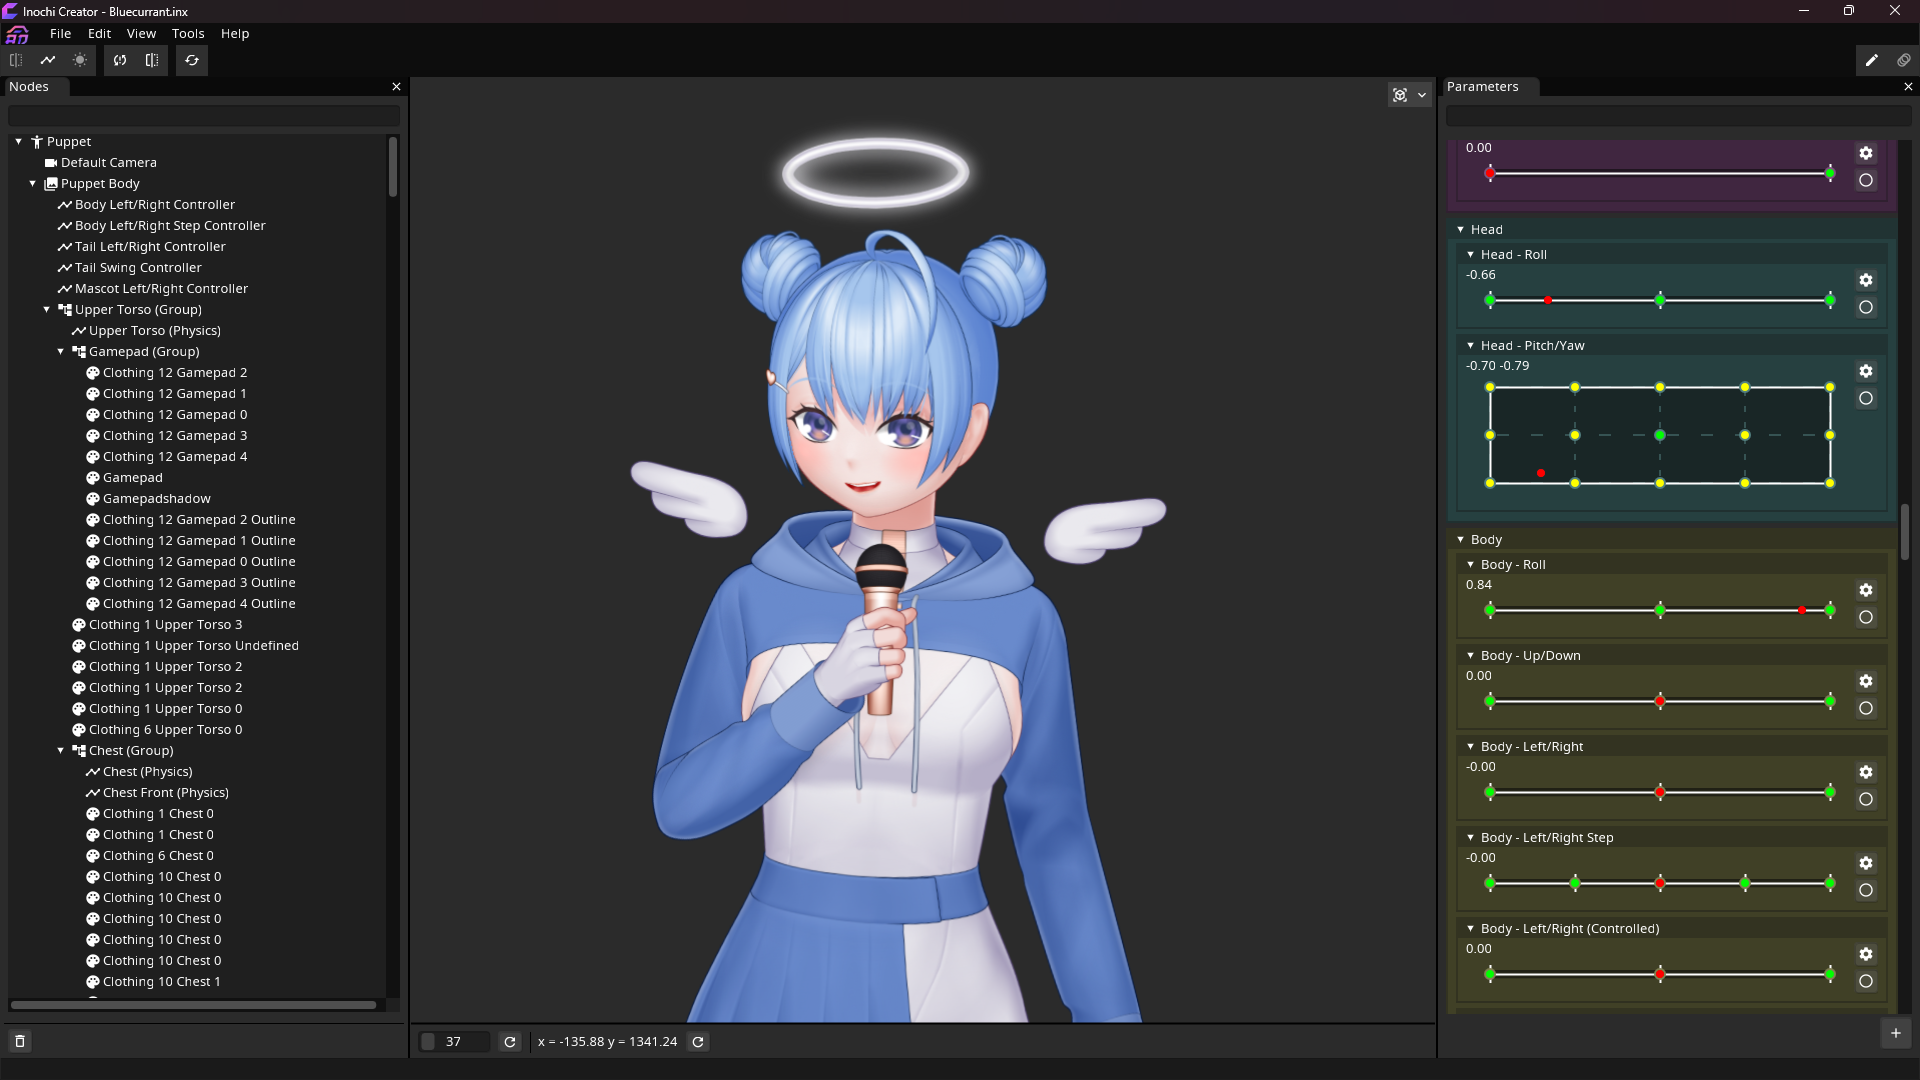
After opening your exported character file with Inochi Creator, you can drag the sliders in the Parameters panel to modify your character's pose and/or expression. If this panel doesn't show up, open the View menu up top, and make sure Parameters is checked.
Once you're done with posing, you can export to image file by opening the File menu, then Export -> Image. If you want transparent background, choose PNG and make sure Allow Transparency is checked.